6
Input Polarity Conguration
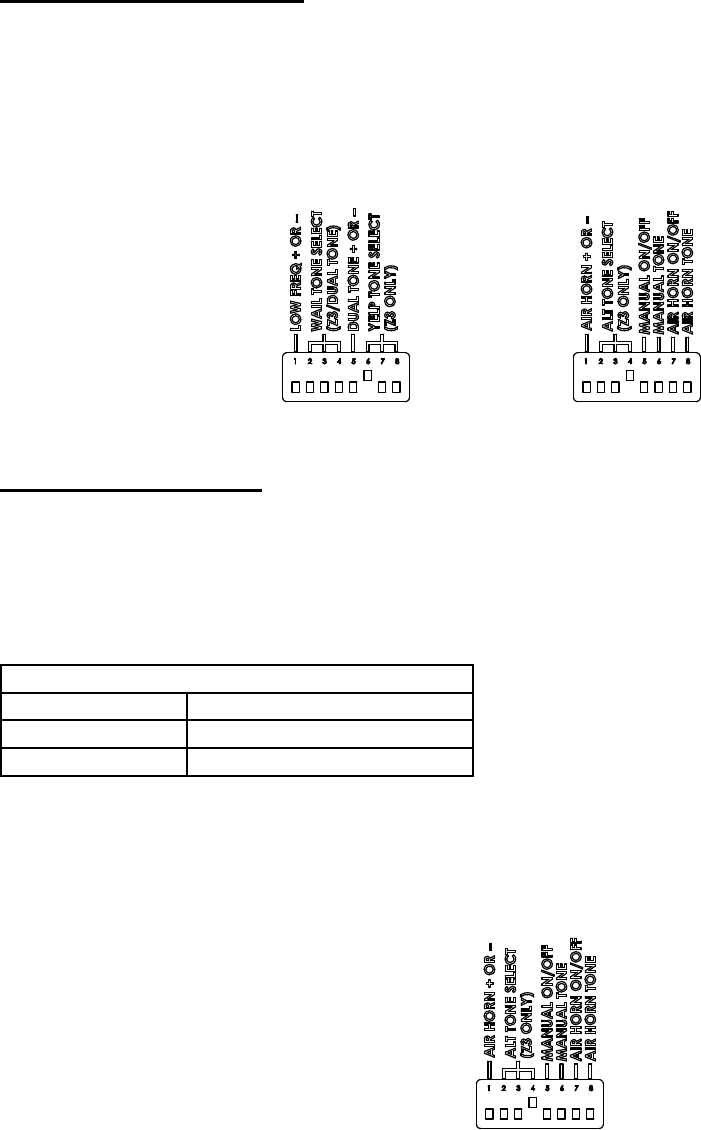
The Banshee has three congurable inputs (Low Frequency, Dual Tone, Air Horn). Each input can be congured for negative or positive activation.
This provides for easy installation into systems that provide a ground signal or a +12VDC signal. These inputs are designed for low current
activation of the Banshee features. The Banshee ships with all inputs set for positive activation. To change any input to negative activation, move
the appropriate DIP switch into the ‘UP’ position.
For each input see the following gures:
Low Frequency input - Figure 7, Position 1.
Dual Tone input - Figure 7, Position 5.
Air Horn input - Figure 8, Position 1.
Additional Z3 Functions
The Banshee can be congured to generate tones when the Z3 Control Head MANUAL or AIR HORN buttons are pressed. The MANUAL feature
can be enabled or disabled and congured to operate the Manual Wail or Wail Stop tones. The AIR HORN feature can be enabled or disabled.
When this feature is enabled, the Banshee will generate the Electronic Air Horn tone.
Z3 MANUAL Operation - To enable the MANUAL feature, move the appropriate DIP switch to the ‘Up’ position (see Figure 9, Position 5).
To congure the MANUAL tone, set the DIP switch according to Table 8 (reference Figure 9).
Table 8: Z3 MANUAL Tone Conguration
Switch Position 6 Conguration
Down *Manual Wail
Up Wail Stop
*Factory Default Setting.
Z3 AIR HORN Operation - To enable the AIR HORN feature, move the appropriate DIP switch to the ‘Up’ position (see Figure 9, Position 7). If this
feature is enabled, the Banshee will generate the Electronic Air Horn tone when the AIR HORN button on the Z3 Control Head is pressed.
Note: This feature should not be enabled for use in vehicles that must meet California Title 13 compliance. The Air Horn input can be used with a
relay (user supplied) that will disable it in compliance with California Title 13.
Figure 7 Figure 8
Figure 9
 (30 strony)
 Manymanuals.com
 Manymanuals.de
 Manymanuals.fr
 Manymanuals.it
 Manymanuals.pl
 Manymanuals.cz
 Manymanuals.es
 Manymanuals-pt.com
Komentarze do niniejszej Instrukcji